Blink example on Nucleo L476RG
This example uses the built-in Arduino Blink sketch. No additional library is required.
Prerequisites
- A Nucleo L476RG board
- Arduino IDE 2 with the STM32 core installed
- A USB data cable connected to the board's ST-LINK USB connector
If the core is not installed yet, follow the Getting Started guide first.
Select the board
- Connect the board to the computer.
- In Tools > Board, select STM32 boards and then Nucleo-64.
- In Tools > Board part number, select Nucleo L476RG.
- In Tools > Port, select the port provided by the board.
See Getting Started for screenshots and more details.
Open and upload the example
- Open File > Examples > 01.Basics > Blink.
- Click Verify to compile the sketch.
- Click Upload to program the board.
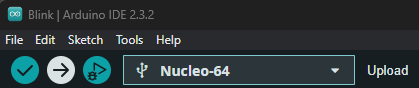
If the default upload method does not work for your board, see Upload methods.
Expected result
After a successful upload, the user LED on the Nucleo L476RG should blink once per second. The sketch uses LED_BUILTIN, so the LED pin is selected by the board variant.
Troubleshooting
- If the upload fails, check the selected board, port, USB data cable, and upload method.
- If no port appears, reconnect the board and check that the USB cable is connected to the ST-LINK connector.
- If the upload succeeds but the LED does not blink, press the board's reset button and verify that the correct board part number was selected.